Sea Grapes Grow Guide

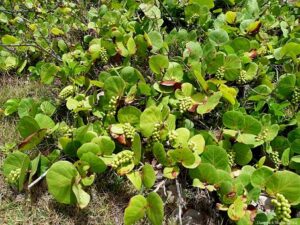
Sea grapes are grown in many coastal areas because of their high salt tolerance the sea grape tree can serve as a dune stabilizer and protective habitat for small animals. This evergreen is a tropical plant that’s native to tropical America, the Bahamas, the Caribbean, Bermuda, and the Greater and Lesser Antilles. Sea grapes can be grown as a tree, hedge, or shrub.
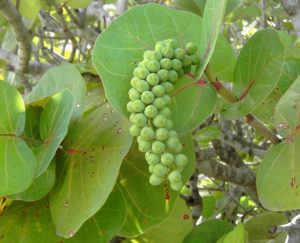
Apart from humans finding these berries to be delicious the fruit of the sea grapes is also enjoyed by many wildlife as well, some of which include the gopher tortoises, songbirds, beach mice, and lizards. Sea grape leaves are wide and rounded, the younger leaves are red but once mature turn a bright green color.
It’s believed that natives once used the leaves as plates to eat their meals, the leaves were also pinned together and used as hats to protect the head from the heat of the day, and the leaves serve as notepaper for emergency messages as well. We will be taking a closer look however at how to grow sea grapes from seeds.
10 Steps to Grow Sea Grapes from Seeds
1. Based on the number of seeds your desire to germanate prepare individual 4-inch containers with a mixture of one-half part clean fine sand and one-half sterile compost.
2. The seeds of the sea grape can be collected in a container once the fruits or berries ripen to a deep purple to blackish color. Ensure that the seeds are healthy without any signs of injury or damage. The ideal time however to collect the seed is during late summer or the early fall months.
3. Crush the seeds by pressing them gently with a spoon, now soak the fruits in clean water, the fruits should be immersed in the water. Allow the seeds to soak overnight.
4. With a nylon pot scrubber begin to clean the seeds by removing any pieces of flesh that are still clinging onto the seeds, rinse the seeds thoroughly and place the seeds on a dry sheet of paper towel or napkin.
5. Once the seeds have dried on the paper towel sow each seed in the containers with the potting mixture, each seed should be sowed 3/4 inch deep, now cover the seeds with more of the potting mixture. Water lightly but thoroughly because applying water with force will wash the mixture out of the containers. Applying the water will also settle the mixture.

6. Each container should be placed indoors near a south-facing window because this is where most sunlight comes through. The containers can be placed on a propagation mat set at 80 degrees Fahrenheit. It is important to cover the containers with a sheet of plastic wrap, this will help encourage germination.
7. To ensure that the mixture doesn’t lose moisture check the first few inches of soil by testing the dryness with your finger, the potting mixture should always be moderately moist for germination to take place. Don’t ever allow the soil to dry out nor overwater your seeds which can lead to rot.
8. Seed germination should take place after 3 weeks or 20 days after sowing seeds, sometime it may take longer but continue to ensure sea grape seeds are getting the right amount of water and light requirement.
9. Once the seeds have germinated remove the plastic wrap and the propagation mat.
10. The sea grape seedlings can now be moved outdoors in an area that’s lightly shaded and warm, once the seedlings reach 8 inches or taller and can now be transplanted in their permanent location. Ensure that the location that’s chosen gets full sun. If you are planting a hedge then space each seedling about 3-4 feet apart, for a single specimen give a spacing of at least 15 feet from other garden plants.
In case you missed it
The final word on how to grow sea grapes from seeds
Sea grapes are delicious and will complement a garden setting by serving two purposes being used as an edible plant and for aesthetics, I have worked with the sea grape plant on many garden projects and I have never been disappointed, this evergreen is a low maintenance plant with little pests issues. This guide will help you as you seek to successfully grow sea grapes from seeds.
About the author
Norman loves being in the garden, both at home and for his job....
he is 'Natures Little helper' being outdoors, growing his vegetables and flowers from an early age.
Now having spent over 22 years in the profession he want to give some of his knowledge to others...
his vast array of hints and tips you will find scattered over this site will help you no end growing plants in your garden.
