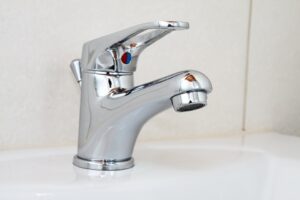
Tips for Fixing a Faucet that’s Leaking

A leaky faucet has the potential of racking up hundreds of dollars over time if the problem is not addressed, I had to deal with this issue numerous times in my home. A leaky faucet can also become annoying because of the drip, drip, dripping sound. I am sure that I am not the only one that have had to deal with a faucet that leaks and continues to leak until a plumber had to be called in or you may have done the job yourself.
At one time my wife tackled the job herself and did a good job at changing the faucet and causing the leak to stop ” who says a woman can’t get in a man’s world and do a great job as well”. However, when it comes to a leaky faucet there is the common practice of using a container to catch the water but that does not solve the problem it must be addressed. Leaky faucets are all too common in many households, what we will be discussing is how you can once and for all fix this issue so let’s take a closer look at how to repair a leaky faucet.
5 Steps on How to Repair Leaky Faucet
1. Shut Off the Water
- First, shut off the water supply line, and turn or twist the valve under your sink to turn off the water supply. If no individual shutoff valve is under the sink shut off the water supply that leads to your home.
- Now turn on the faucet and allow it to remain open, this will allow the remaining water in the line to drain freely
2. Lose and Remove the Handle or the Knob
- If there is a set screw behind the knob or the handle with the help of an Allen wrench or hex key remove the screw by inserting one of these tools into it and being turning it to move. However, if the handle has a top screw cover use a flathead screwdriver and pry it off.
- Now use a Philips screwdriver and begin to loosen the screw which is under the cover, now gently remove the handle
3. Removing the Faucet Stem
- Next with a wrench loosen the packing nut in the handle assembly, now remove it, and with a gentle motion pull this part straight up out of the assembly
4. Installing a New Stem or Cartridge
- Once you have inspected the stem or cartridge and it needs to be replaced, note that stems and cartridge comes in different sizes and shapes, to purchase the correct part from the hardware store take the old stem or cartridge with you along with writing down the name of the faucet manufacture and the model number of the faucet
- With a clean cloth clean and dry all the parts including the area around the handle
- Check the O-rings around the housing, any that are worn or damaged should be replaced.
- Now ensure that the new stem or cartridge is aligned correctly and insert it.
5. Reattatch the Handle
- Now that you have installed the new stem/cartridge follow the steps that were taken to change the handle and reassemble the parts including reattaching the faucet handle
- Now proceed to turn your water supply back to the on position
A Bonus Tip for You
In most cases, a stem is used in two-handle faucets, one for the cold and one for the hot, and a cartridge is used in faucets that control both the hot and the cold through the handle.
The final word on how to repair a leaky faucet
Following this guide will have that leaky faucet fixed in no time, it’s that simple. It is good to know that you can DIY your leaky faucet helping you to save by not calling in a plumber to do the job for you.
About the author
Norman loves being in the garden, both at home and for his job....
he is 'Natures Little helper' being outdoors, growing his vegetables and flowers from an early age.
Now having spent over 22 years in the profession he want to give some of his knowledge to others...
his vast array of hints and tips you will find scattered over this site will help you no end growing plants in your garden.
